Contents6 sections
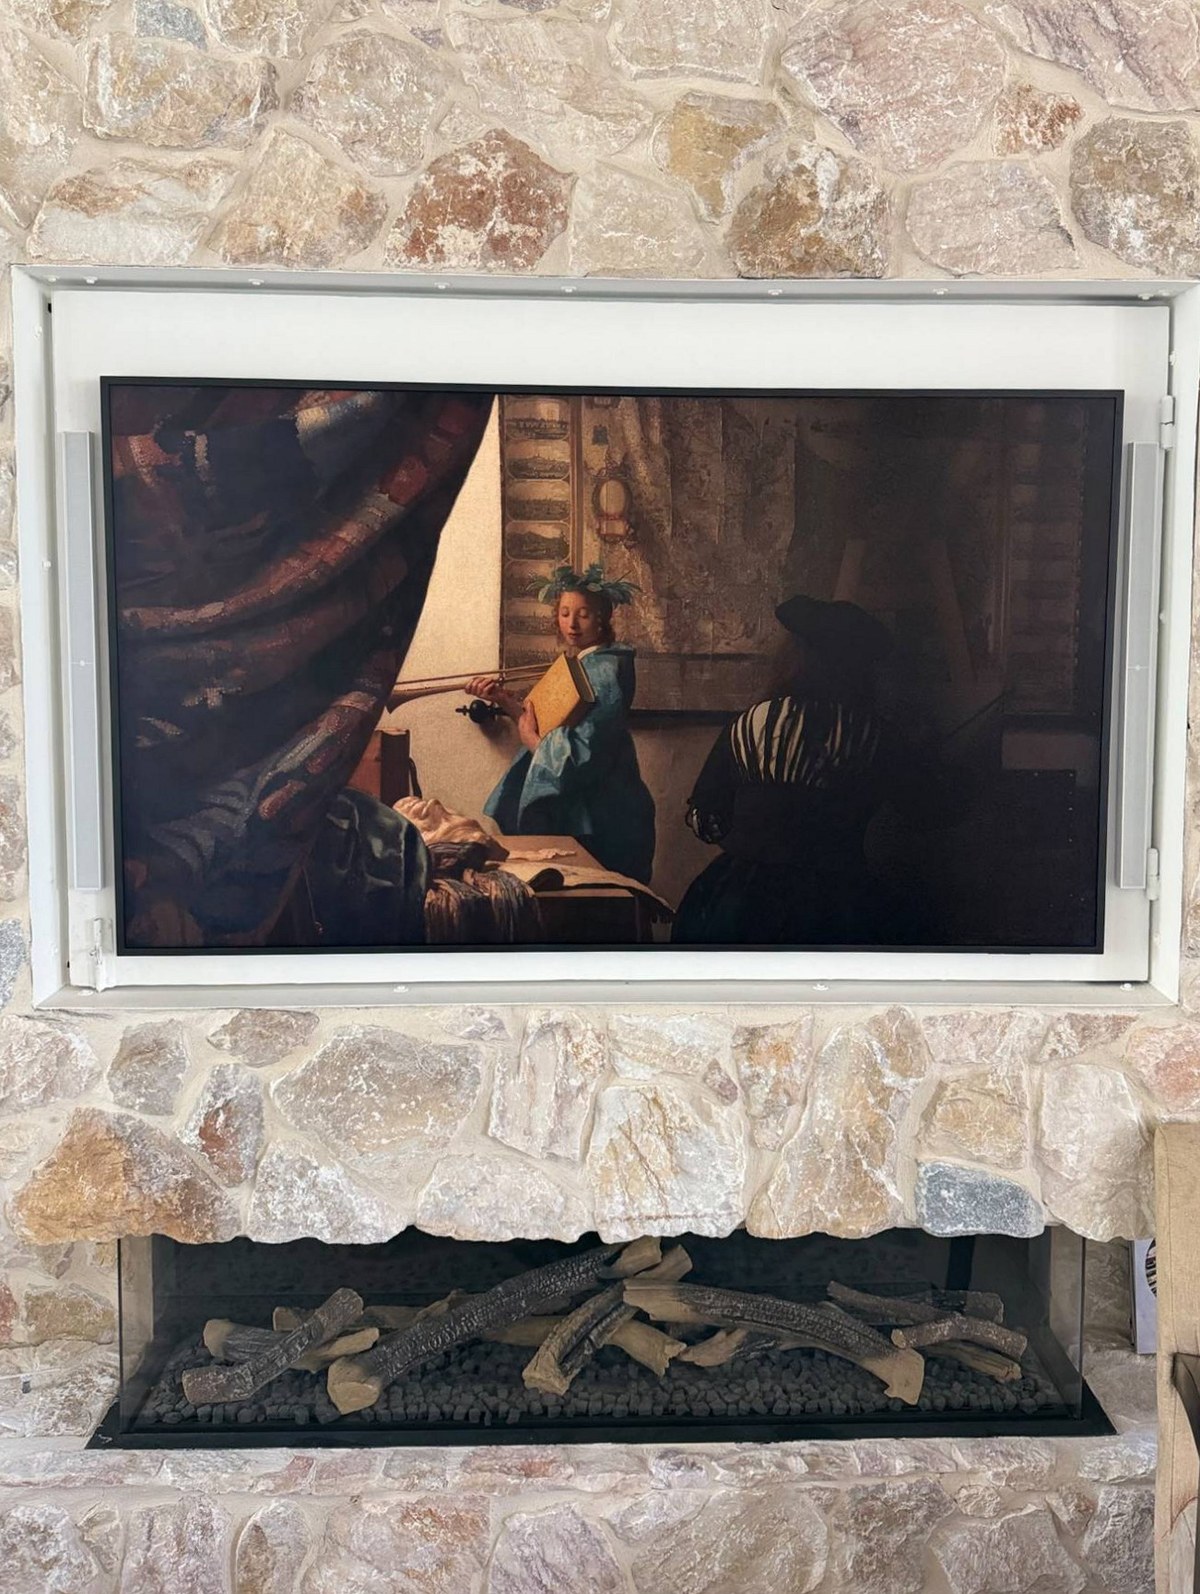
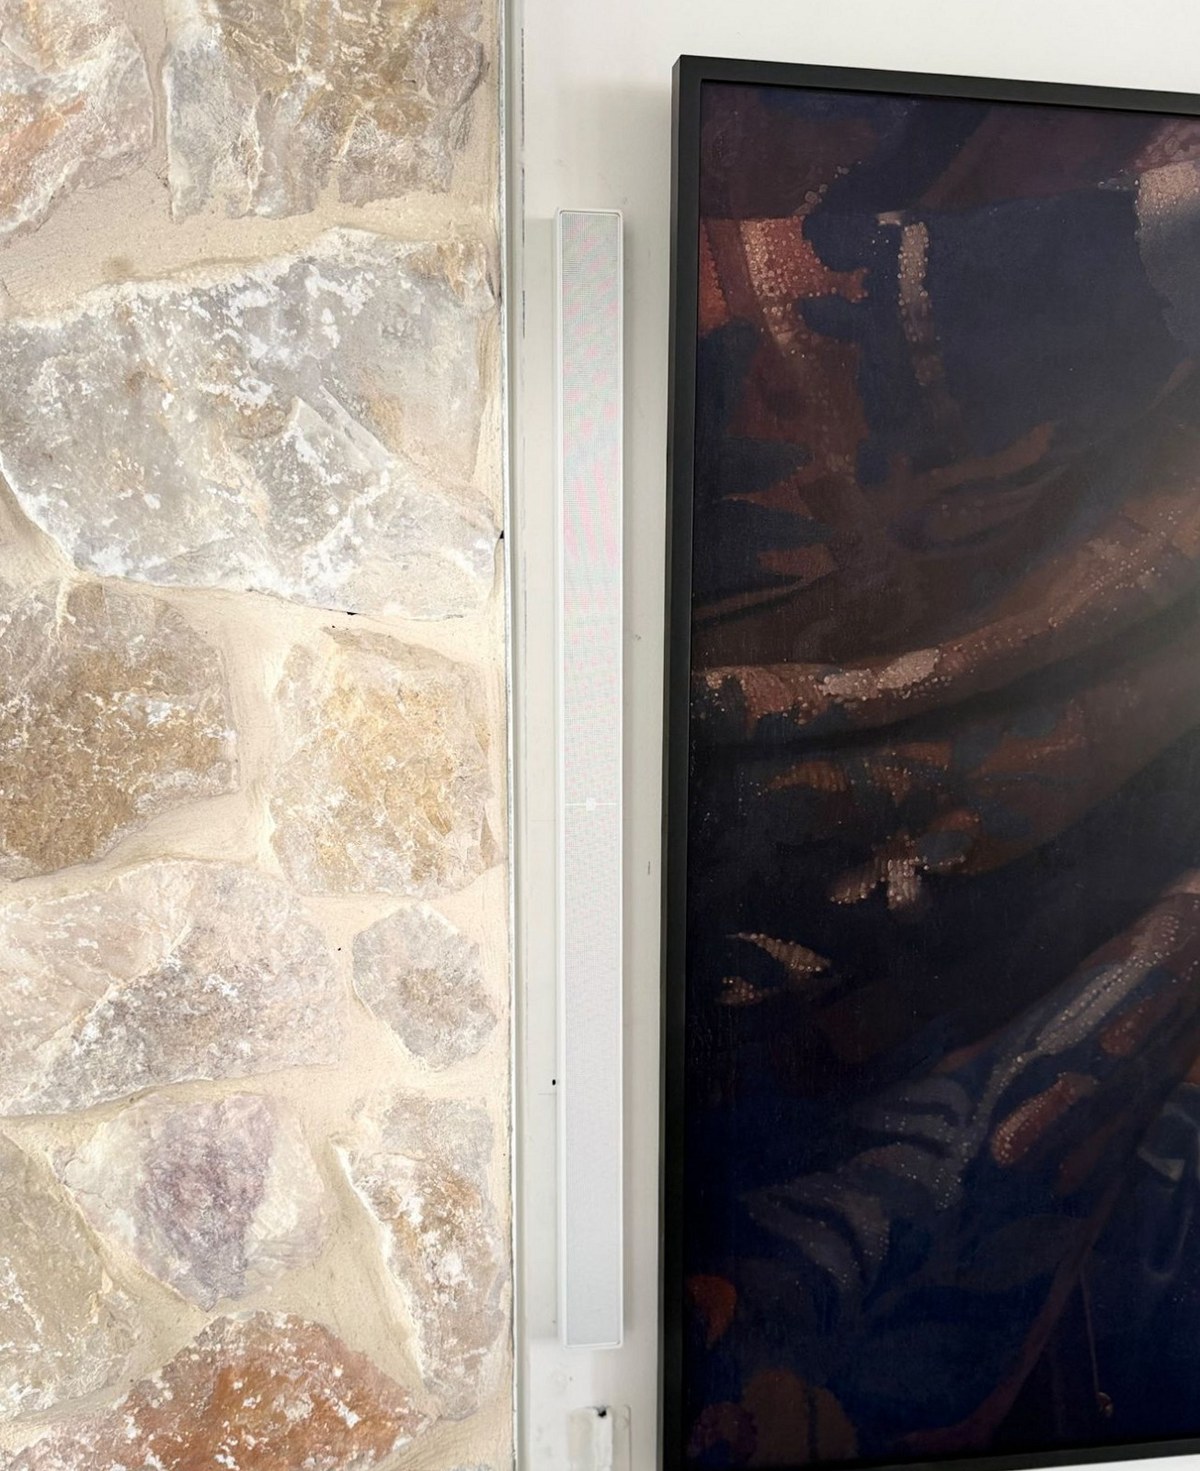
A limestone feature wall, floor to ceiling. A linear gas fire at hearth level, a display recessed into a white steel frame above it, and an air-conditioning slot diffuser above that. Glazing down one side. It is a beautiful wall, and it is a wall with nowhere to put a speaker.
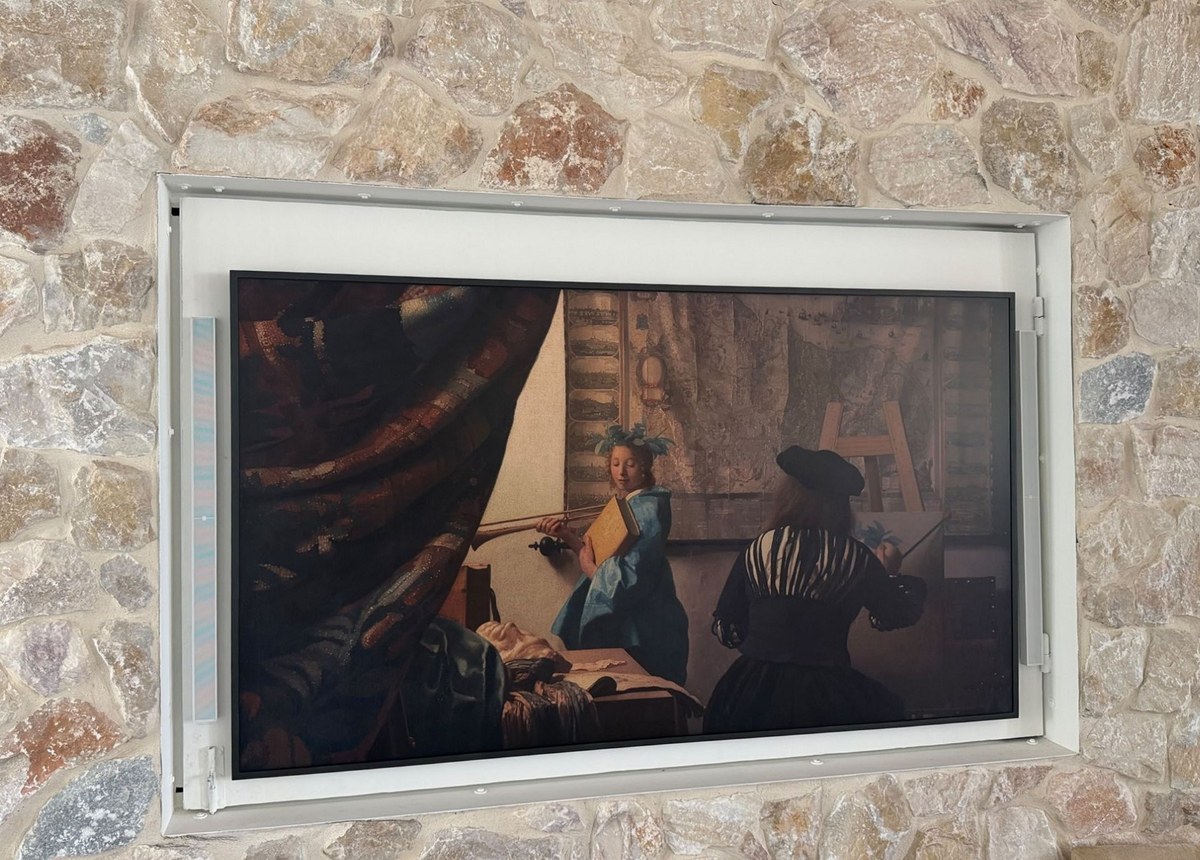
The wall was the finish, not a cavity
The usual assumption behind architectural audio is that there is a void to build into — a stud bay, a ceiling plenum, a service zone behind plasterboard. Here the stone is the finish and the structure in one. There is no bay to open. Cutting a 100 mm aperture into a dressed stone face is not a reversible operation, because the thing you would be cutting through is the thing the client is paying to look at.
Three usual answers, all closed
- In-wall was impossible. No cavity, and no way to make one without destroying the elevation.
- A soundbar did not fit. The display sits on an articulating mount inside a recessed frame. A bar below the screen would either foul the frame's swing or sit out on the stone directly above a working fire.
- Floor-standing was never available. The hearth runs the full width of the wall.
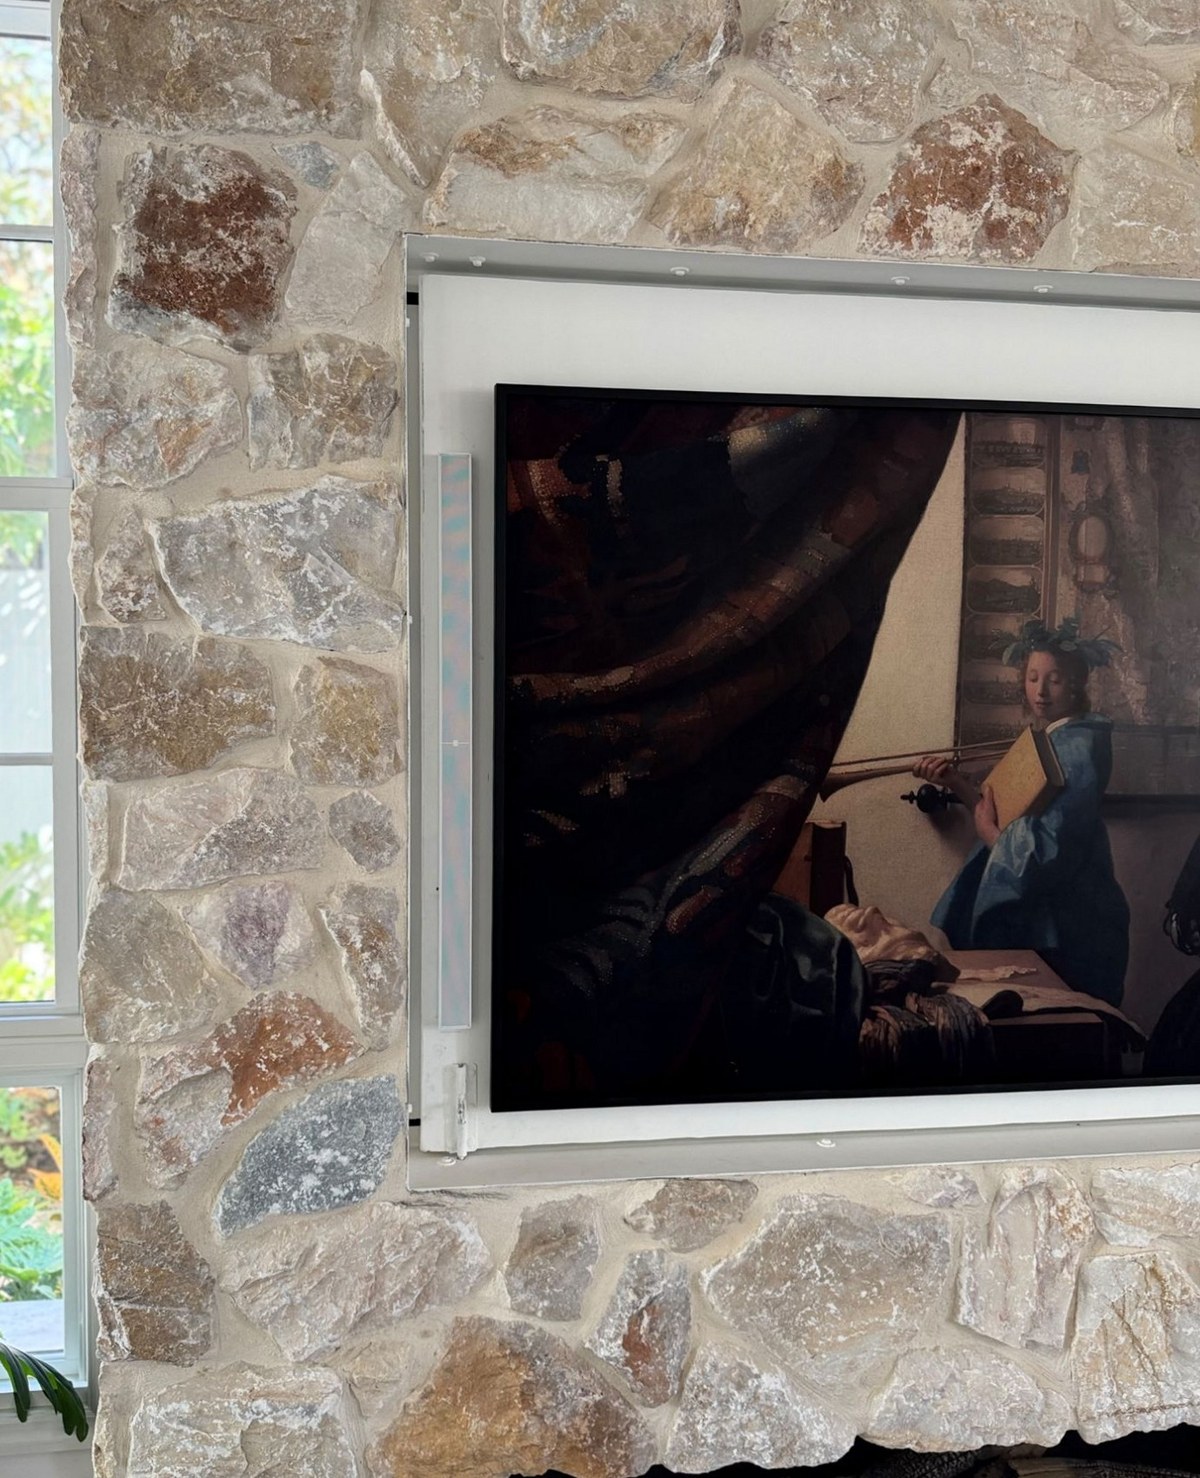
What remained was the only surface on the wall that was not stone: the painted reveal between the display frame and the stone return — a flat band roughly 40 mm wide down each side of the screen.
The only gap that was not stone
A pair of QuadCane slim arrays in white, mounted vertically in that reveal, flanking the screen. QuadCane is 763 mm tall, 43 mm wide and 21 mm deep. At that depth it sits inside the reveal rather than standing proud of it, and in white against white-painted trim the eye files it as part of the frame detail rather than as equipment.
Nothing was cut into the stone. The speakers mount to the painted reveal on QuadCane's keyhole fixings, which is also why this was reversible — a decision that matters on a wall that cannot be patched.
Why a column suits a wall like this
QuadCane puts sixteen drivers in a vertical line, and that geometry gives 140° horizontal by 25° vertical dispersion. The wide horizontal figure is what lets a pair mounted close together either side of a screen still cover a room — they are far nearer each other than a conventional stereo pair would be.
The narrow vertical figure is the one that earns its place here. This wall is stone above and a stone hearth below, both hard, both close, both within a metre of the speakers. A column that concentrates its output into a 25° vertical window puts less energy into those two surfaces than a point source would, which means less of what reaches the listener arrives via the stone.
What 21 mm cannot do
QuadCane runs to 150 Hz at ±3 dB, with a recommended crossover at 200 Hz. It is not a full-range speaker, and no 21 mm-deep enclosure is going to be one — Hoffman's Iron Law takes its payment in low-frequency extension, and this design pays it there deliberately so that the depth and the output can stay where they are.
So a wall like this needs a subwoofer to be a complete system. Where the subwoofer goes is its own problem in a room with a stone chimney breast, and the usual advice about corners stops being reliable.
There is one partial answer in the electronics. PsySculpt, in XSCACE Studio, synthesises harmonics of fundamentals the cabinet cannot physically reproduce, so the ear infers a fundamental that is not being played — a speaker rated to 150 Hz reads to roughly 75 Hz. It is not a bass boost, and it does not replace a subwoofer. It changes what the speaker sounds like it is doing between 75 and 150 Hz, which on a wall-mounted pair is the difference between thin and convincing on music.
How this wall was planned, controlled and calibrated
Planned
A wall with one viable mounting position and two hard reflective planes is exactly the case where a coverage prediction is worth making before anything is drilled. Floorplan Sound Simulation runs sixteen guided steps from tracing the room off the plan through to the bill of quantities; the ones that decide a wall like this are the SPL prediction and the acoustics.
The rail runs in order, because each step depends on the ones before it. For a single stereo zone on one wall, the steps that applied were:
- Upload the floor plan and trace the room into its own zone.
- Set the scale from a dimension already known on site.
- Tag the zone. This one is Music & Multiroom rather than Home Cinema, and that single choice changes what the report produces — a combined SPL map with the imaging angle and the reflection count at the seat, rather than a page per channel group.
- Set the listening position, and the screen direction.
- Place the pair at their real mounting height — in the reveal, either side of the display — with QuadCane's real 140° × 25° dispersion rather than a generic pattern.
- Set each wall's absorption independently: stone, glazing and plaster are three different surfaces and the model treats them as three.
- Choose amplification, which carries through to the signal flow and the bill of quantities.
- Read the coverage across Low, Mid and High, and check the room modes and first reflections.
- Check the stereo imaging angle at the seat against the 45–60° target.
- Export the bill of quantities, the report, and the private client link.
Within those steps, the four outputs that decided this wall were:
- Coherent SPL prediction on an absolute dB scale, modelling real interference between the pair across Low, Mid and High bands — not a relative coverage blob.
- Per-wall absorption, set independently. A glazed elevation and a stone one stop being modelled as the same surface, which on this wall is the entire point.
- Axial room modes from the traced geometry, with boom and null flagged at the listening position, and first-reflection points drawn on each wall.
- Stereo imaging, which checks the angle the pair subtends at the seat against the 45–60° target — the check that matters most when the two speakers are constrained to a screen's width apart.
The output is a client report and a bill of quantities per zone, and a private client link with an interactive 3D model rather than a PDF attachment. A full guide to that workflow is in the journal.
Controlled
Driven from an XSCACE DSP amplifier, the pair is configured in XSCACE Studio over the local network. Connect a QuadCane and the amplifier lists an XSCACE factory preset for that model — crossover, EQ and limiter threshold already set from the speaker's real driver and power handling — so the zone plays correctly before anything has been measured. X-Sense writes its correction live to the Xylem 2, 3 and 4 and the Root 4 while they are playing.
Calibrated
The eleven-instrument Calibration Toolkit in Studio measures what the room actually does. On a wall of this kind the measurements that decide the result are:
- SPL per channel at the seat, against the design target rather than a room average.
- Frequency response through the 150–200 Hz crossover region, where the pair hands over to the subwoofer.
- Sub alignment — delay and polarity between the subwoofer and the pair, which is where a single sub is usually lost or won.
- RT60 to ISO 3382-1, because stone and glazing make a livelier room than any model assumes. Studio refuses rather than guesses here: below an r² of 0.90 it reports no figure and tells you which way to move.
- Early reflections against the direct sound — the specific thing the 25° vertical pattern was chosen to manage.
In order, on site:
- Discover the amplifier on the network. Devices announce themselves, so there is nothing to pair and no address to type.
- Load the QuadCane factory preset — crossover, EQ and limiter threshold already set from the model's real driver and power handling.
- Set per-channel gain, delay and the 200 Hz crossover, with the curve rendering live.
- Run X-Sense sweeps from up to three listening positions.
- Review the fitted correction band by band before applying it.
- Write the correction to the amplifier while it is playing, over the network.
- Run the verification pass, which re-measures with the EQ live and overlays before, target and after.
- Measure the room with the toolkit: SPL, RT60, sub alignment, polarity and early reflections.
- Export, with the RP22 checklist as its own section of the client PDF.
X-Sense then fits corrective EQ from sweeps at up to three listening positions and re-measures with the correction in place, overlaying before, target and after. Where a project is held to a performance level, the CEDIA/CTA RP22 checklist judges the finished room parameter by parameter and states the verdict without softening it. The full audio calibration workflow is written up separately. A prediction that is never checked is just a drawing.